
Table of Contents
Simple drawing ideas for children
As a former class teacher, I saw first hand the students were often safe, how and where they should start their design projects. This confusion often led to frustration or even decided not to draw. It seemed that there was a better way to easily share design ideas for children, but it took time to understand how it works.
Direct drawings at the front edge worked for a while, but they were limited. There is also the question of rhythm. Some students wanted to go faster and faster and a little slower. He held the entire process a little chaotic, both for them and for me too for them.
The solution?
The most significant advantage of increasing the process on paper was that everyone could finally work independently. Tutorials showing every step have suddenly transformed a loud process into a very calm and happy class! The more tutorials that I did, the more I found her helpful. Students could build their confidence, learn the following instructions’ value, and hope to start drawing. New drawing ideas for kids are often added, then keep up to see the last. It could be the perfect lesson for your class today!
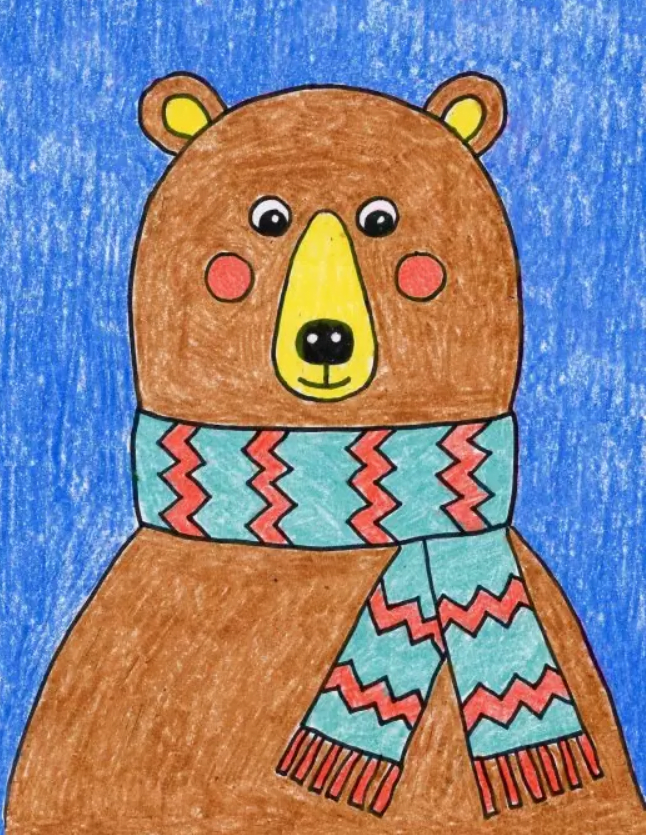
Draw a bear
The beautiful thing about simple design ideas is that most students see the example and adapt to their current skills. Children, for example, could follow this tutorial and focus on the face of a bear for the first time to make sure they take their eyes and nose in the right place. And fifth elementals could see a simple way to shade the simple white body on one side. Or the scarf as a way to add more complex patterns and colors.
The years of work with the mixed-level after-school classes taught me that simple ideas often have a large vehicle for various primary students. Maybe not every day, as some need more challenges on the way, but certainly more often than I thought.
Materials to pull a bear with a scarf
- Eraser. Large sizes allow you to keep a much better job than the simple tips.
- Marker Black Sharpe. These pens for the permanent felt-tip pen take beautiful black contours. They have an excellent time dyeing and never bleed when they bathe. Use good ventilation and add the card below to protect the tables.
- Prang paste. It is softer than other crayons, so you sometimes resemble oil crayons. Unless they buy their giant boxes, they also have some beautiful brown shades that Crayola No.
- Crayola crayons. The reliable brand that always works well. The 24-pack has some of my favorite golden and yellow, orange colors that appear vain and warmer than those with Prang.
Step By Step Drawing a bear with a scarf
- Draw you on the head.
- Add the scarf.
- Shoulder
- Add your ears and nose.
- Draw the eyes and snout.
- Finish your eyes, your mouth, your cheeks.
- Add the terminal scarf.
- Decorate the scarf with the models.
- Track with marker and color.
How do you draw a bear?
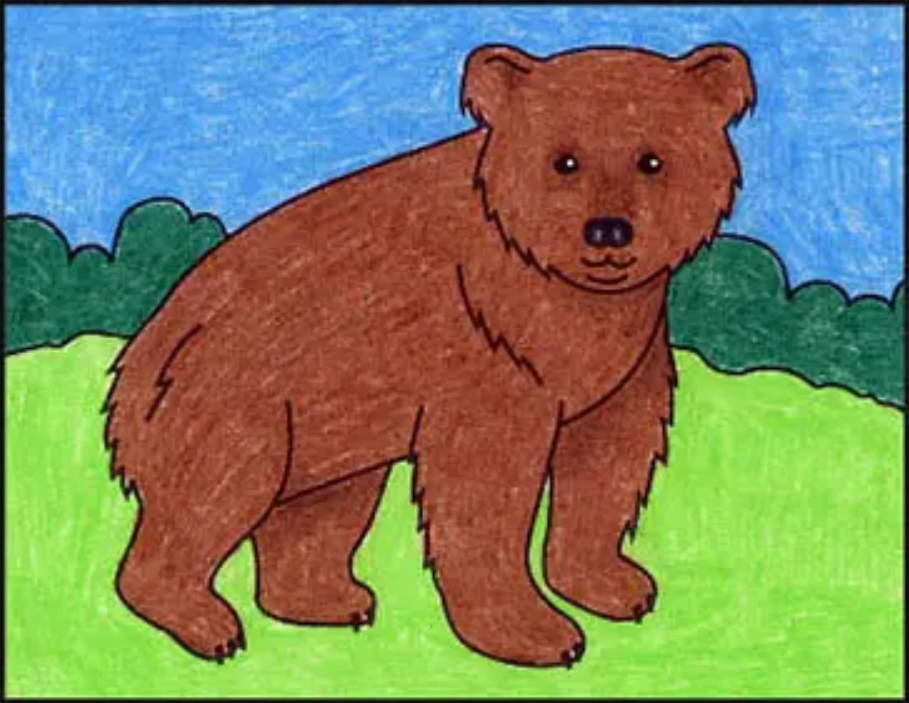
Sometimes the bears seem complicated to draw with their great hairy bodies. It can be not easy to see where and how your legs and arms stay on their bodies. However, do not worry about drawing a tutorial of the bear, showing the students as they draw a beautiful smooth body with their legs, and then adding some fuzzy edges in the area.
Breaking this process into two steps will ensure that students first share the bear before adding these small fuzzy lines. It’s not fun to get to the end of your design, and then I would like to have parts of the biggest or more petite body. Then again, this is part of the learning process!
Step By Step Instructions to draw a bear
- Draw the shape of the base head as shown.
- Add two ears and the shape of the round torso.
- Draw a front and rear overlap.
- Delete the gray line and add two more legs.
- Draw the details of the face and the ear.
- Add some fuzzy fur lines around the body.
- Delete the gray lines and add claws.
- Draw the landscape in the background.
- Track with marker and color.
Also Read: How internet change pop culture


